Przejdź do polskiej wersji tego wpisu / Go to polish version of this post
I have written quite a bit about setting up various types of home servers. I talked about Raspberry Pi as well as slightly more powerful terminals. But does everyone need a server in the form of a separate machine? What if someone wants to start learning and/or check if it’s even for him/her, while at the same time minimize costs? It turns out that all you need is any laptop with Windows 10 (or 11), on which you can easily install a virtual Linux environment, specifically Ubuntu, and have the equivalent of a server, but running on your computer. We’re not talking about installing a second system or replacing Windows with Linux. In this post, I will show you how to run Linux as a subsystem inside Windows. Of course, this is not a solution that will create a server running 24/7 (unless your computer is always on), but rather a simulation of a server that will only run when you need it.
Preparing your computer
To install Ubuntu inside the Windows operating system, we first need to enable virtualization in the BIOS. To access the BIOS/UEFI, follow these steps: Start menu -> Change advanced startup settings -> Recovery tab -> Advanced startup -> Restart now button -> Troubleshoot -> Advanced options -> UEFI Firmware Settings -> Restart button.
Unfortunately, from here on, it’s a bit more difficult for me to provide the correct path, as there are as many different arrangements of settings in BIOS/UEFI as there are computers. Similarly, I can say that for computers with Intel processors, we are looking for an option called Intel(R) Virtualization Technology, which needs to be turned on (set to Enabled), but I don’t know what the equivalent for AMD devices will be called. It seems that everyone will have to google this for themselves.

In addition to enabling virtualization, we also need to install Microsoft Visual C++, which is an essential component. Simply download the installation file from this page and install it.
Ubuntu environment installation
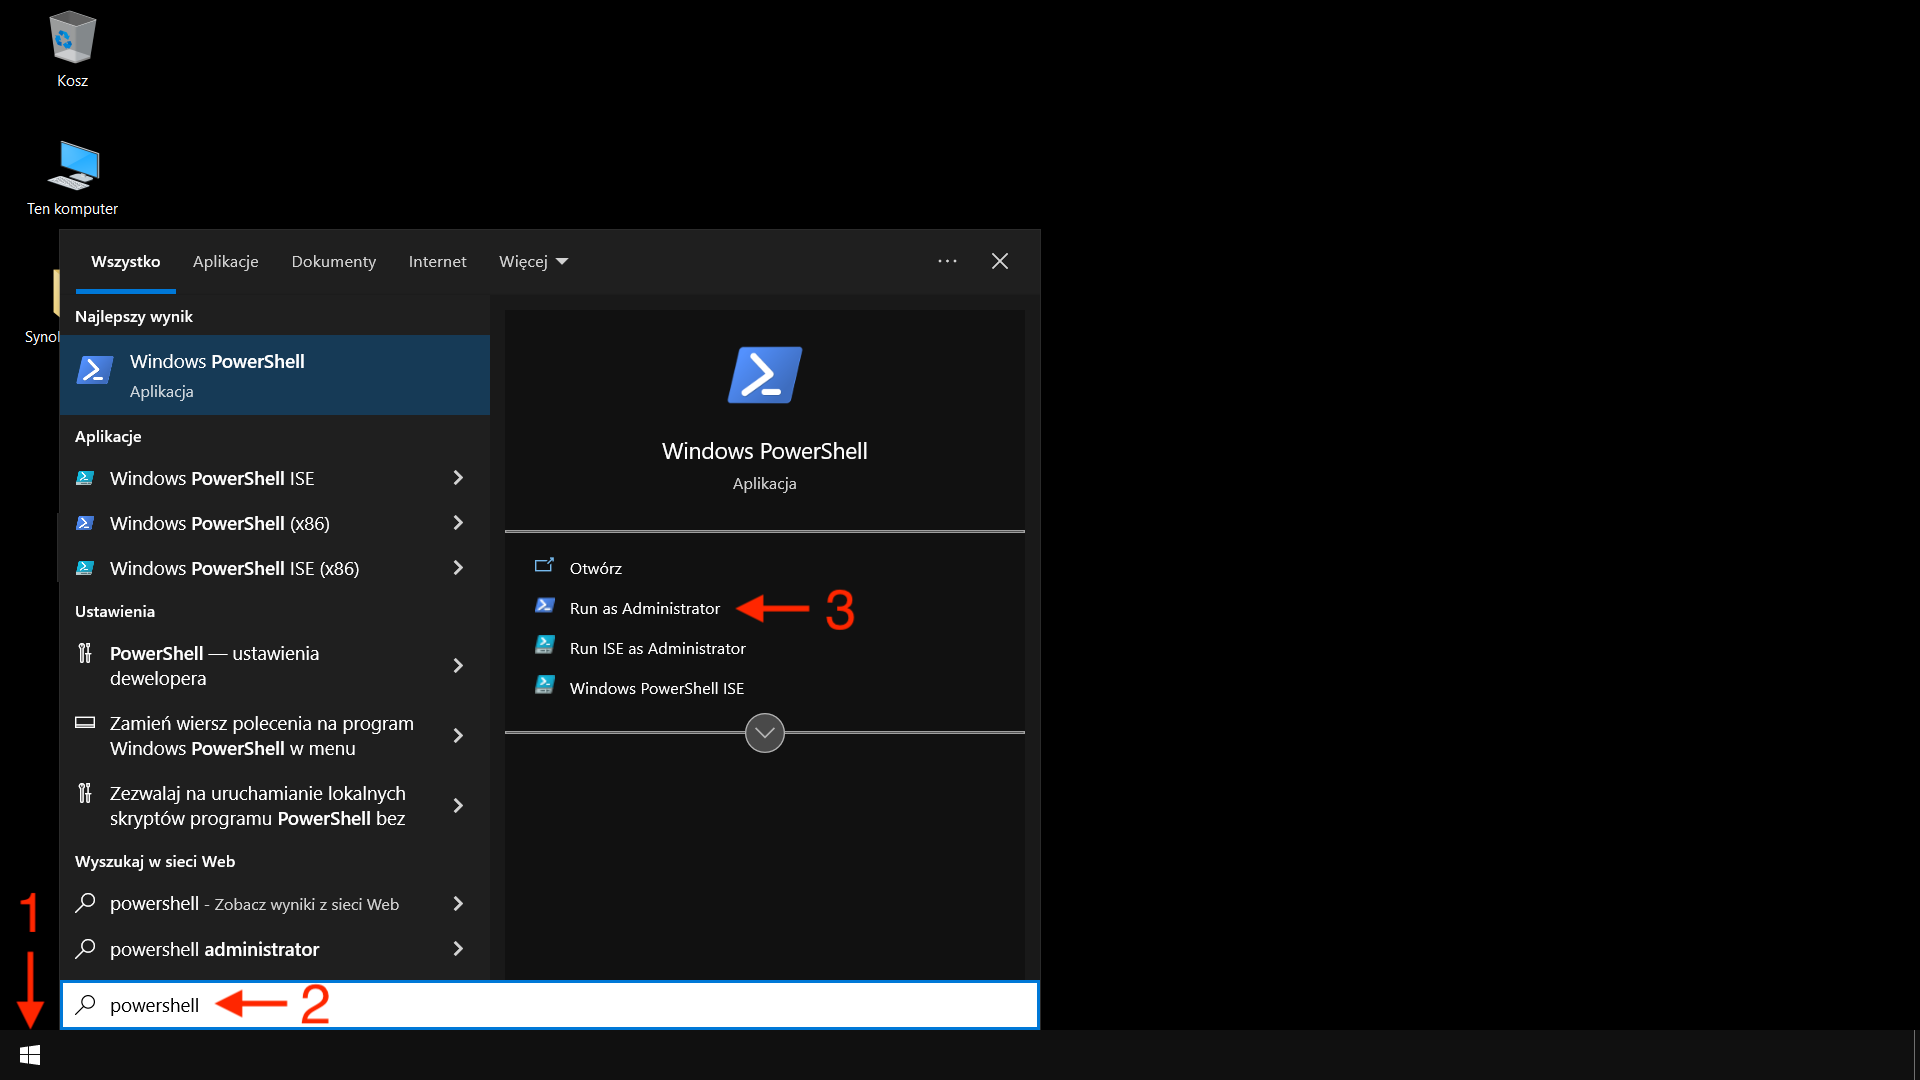
We access the PowerShell, which is the Windows terminal. It is important to run it as an administrator.

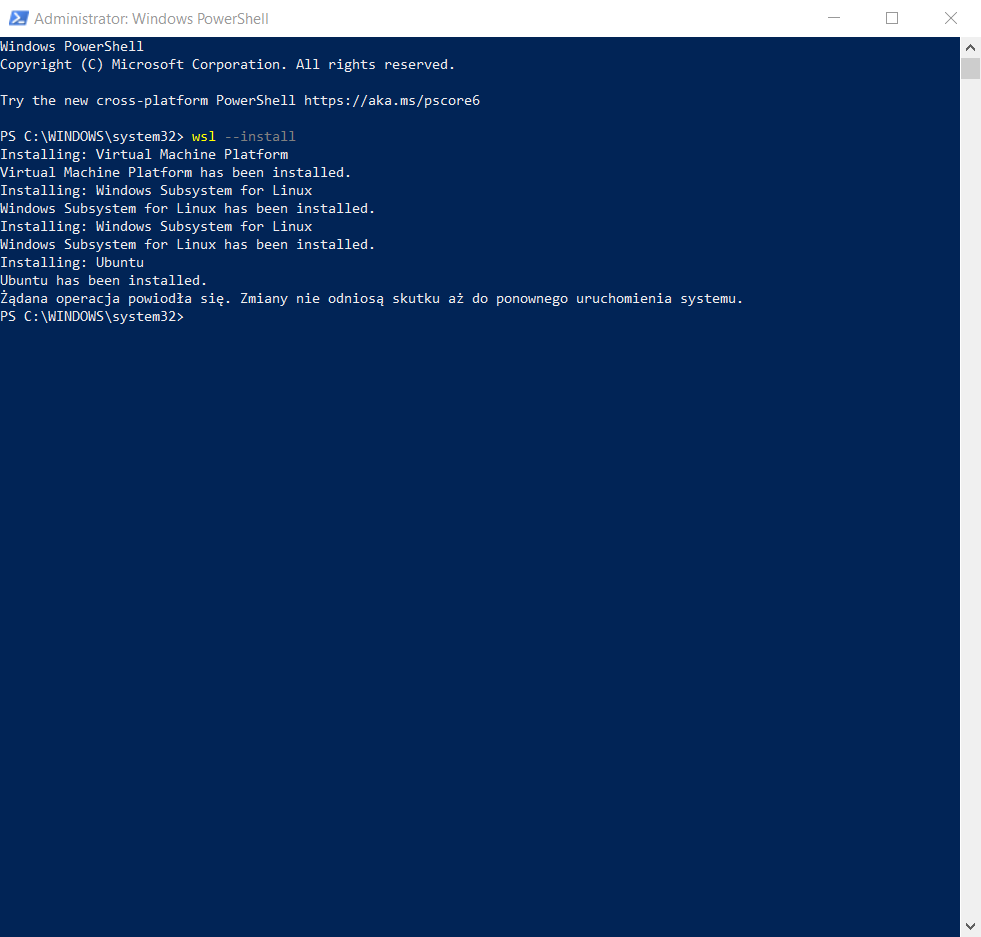
We install WSL (short for Windows Subsystem for Linux), using the command:
wsl --install
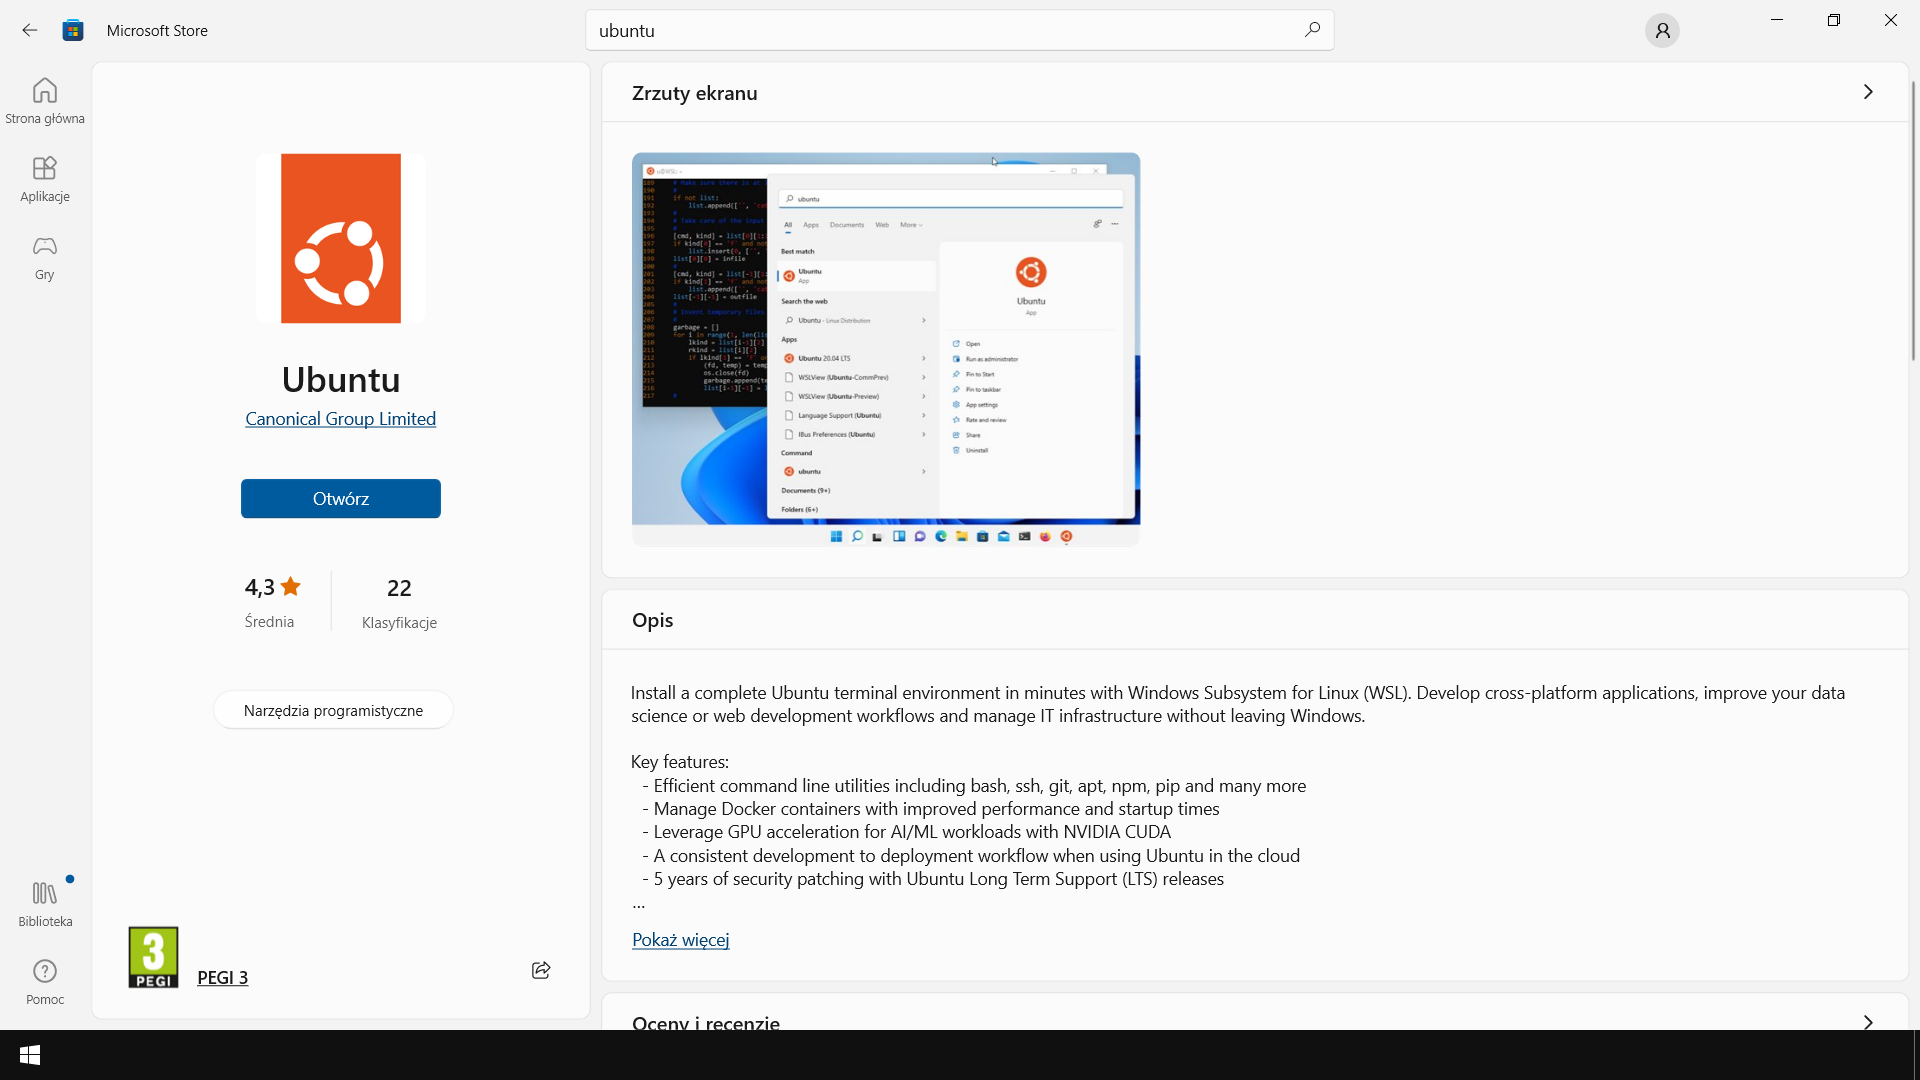
After successfully completing the installation, it is necessary to restart the computer. After restarting the system, we go to the Microsoft Store, type Ubuntu in the search box, and go to the application page from which we can install and run the Ubuntu environment. After installation, it is also available normally from the Start menu or if we have created the appropriate icon on the desktop. In the Microsoft Store, we also have the option to install a specific version of Ubuntu, such as 22.04 LTS or 20.04 LTS, which is giving us a choice in case we want that particular version and not another one.

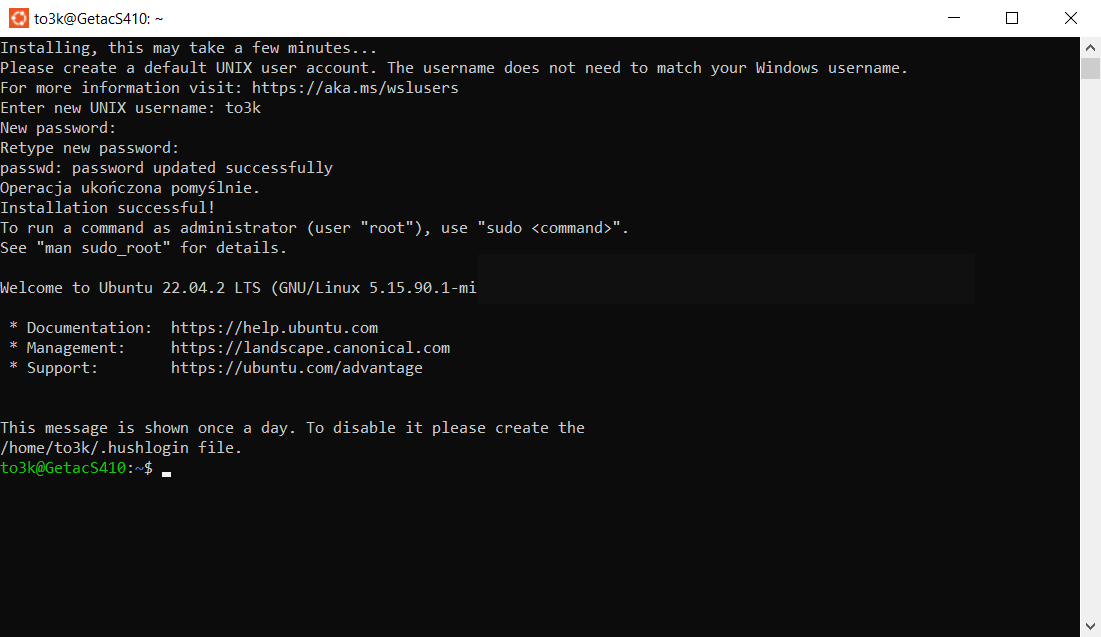
After clicking on the Open button, a terminal window will be launched, in which the main installation will begin. During the process, we will need to provide a username and password twice. After successfully completing the entire process, we will have access to a shell that is no different from an Ubuntu system running, for example, on a Raspberry Pi.

Summary
I don’t think there is anyone who would say it wasn’t easy. WSL is a very interesting creation that has opened up the Windows environment to distributions under the sign of the penguin. However, WSL also has its drawbacks and is rather a solution for occasional use or for use as a test environment. If you are serious about self-hosting, the best solution is still to dedicate a separate machine to it.


